Barcode Generator – Professional Edition Screenshots
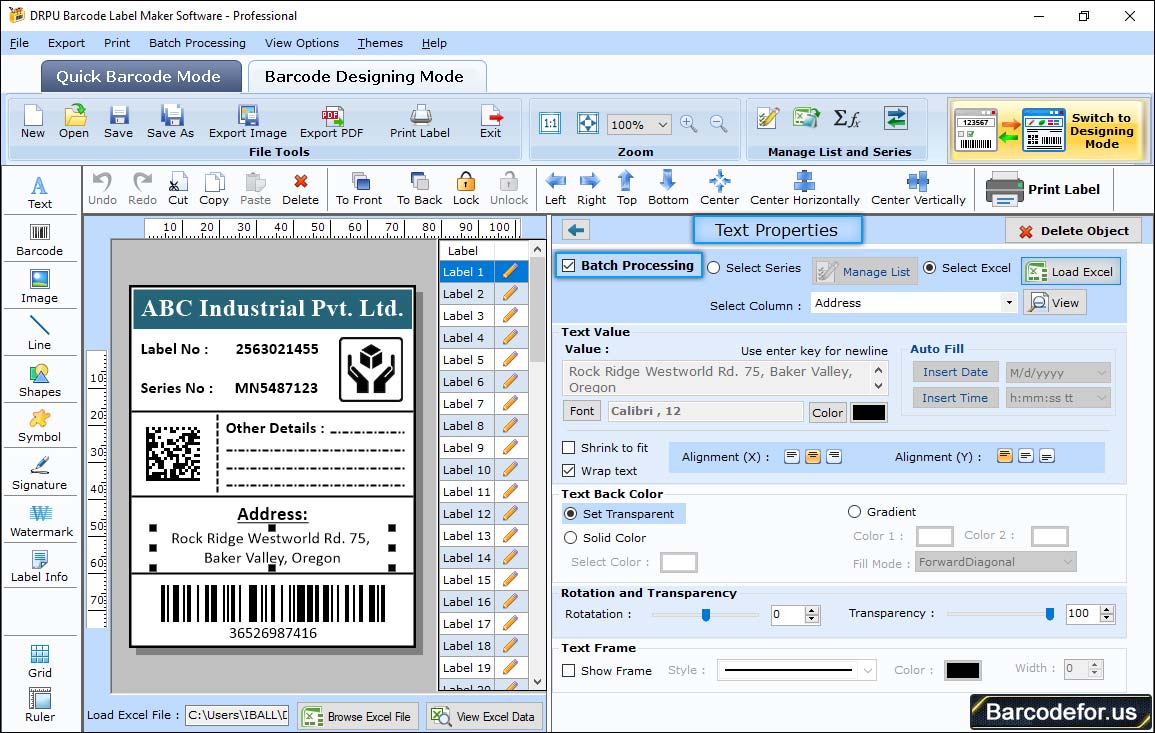
You can add text on your card, by clicking on Text icon from drawing tools as shown in above screenshot.
Set various settings including –
1 Color Settings – Change Text color and Text background color as per choice.
2 Other Settings - Provides facility to rotate text angle or set frame if required.
Insert barcode on label, by clicking on barcode icon from drawing tools. Now double click on default barcode image, following window will be displayed:
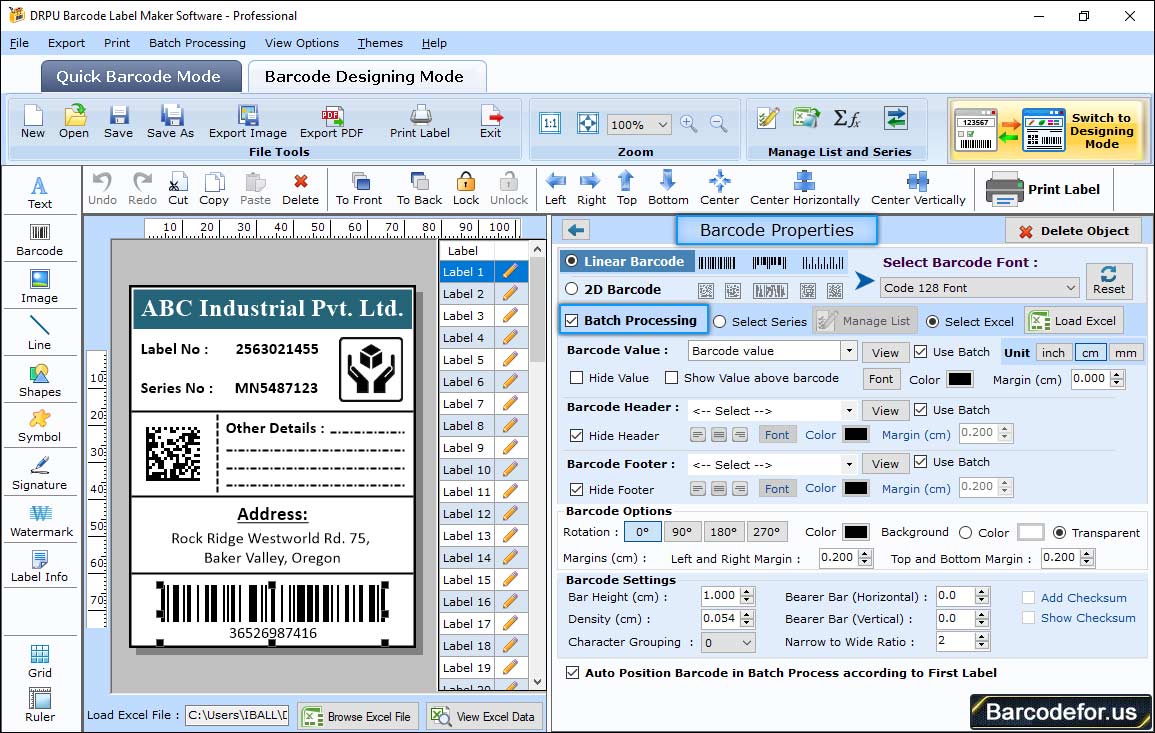
Select barcode technologies and type (2D barcode and Databar Code 128 Set A font). Set different barcode settings using various tabs like –
1 Value Tab - Enter barcode value as per your requirement, you can also enter barcode header and footer if needed. Set other properties accordingly.
2 Size Tab – Using this tab, you can adjust various margin, bar height etc according to your labeling need.
4 Color Tab – Set barcode color, barcode background color, barcode header, footer and value color as per choice (Note – Make sure that chosen color combination is scannable).
After completing barcode designing process, now you can print your designed barcode label using print settings option. Click on print icon from standard tools, following print window will be appeared –
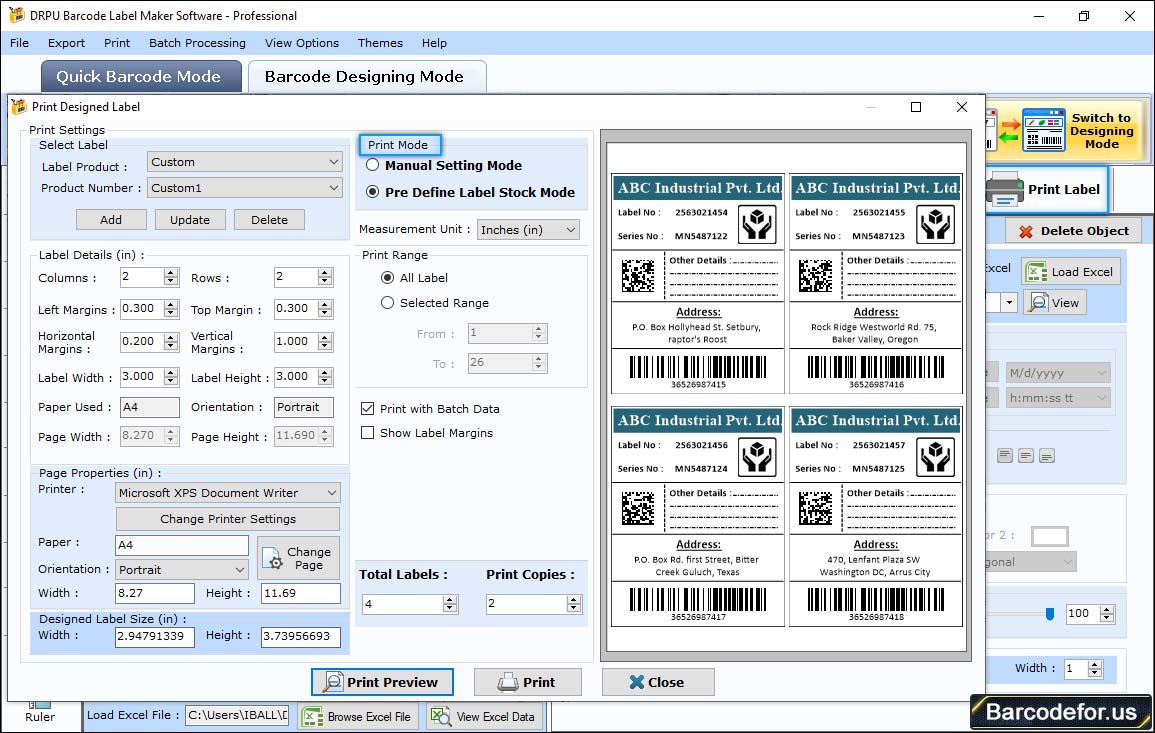
Two mode of printing is available 1 Pre Define Label Stock 2 Manual
In pre define label stock print mode, select a Label Product with b Product Number and set c Printer.
Now press 3 Print button to start printing process.


